How do I Backup my Windows Live Mail Email to External Hard Drive?
Nowadays, email plays important role for everyone. Users are completely dependent on email clients for all formal and personal communication proces. However, consider a scenario when user lost all of its crucial emails. Could it be bearable? No, not at all! Therefore, the blog will discuss the way out and provide the technique that can help in taking you out from such situations by creating email backup. So, in the following segment, we will focus on Windows Live Mail and different methods to backup Windows Live Mail email to external hard drive.
Reasons behind Loss of Emails and the Importance of Email Backup in Hard Drive
Every email application possesses with limitations that allows to hold emails to particular limit, if the limit exceeds, in that case, a user need to save emails from the system and move them to hard drive. Moreover, there are other situations too that can cause data loss trouble such as:
- Sudden hardware failure.
- Malware or Virus Attack.
- Unintentional File Deletion.
- Need of System Formatting.
- Unexpected Data Corruption.
In such circumstances, one can face data loss permanently. But, do not worry, because creating backup will give sound sleep at night. Having email backup on external hard drive is the clever choice as it gives the flexibility to access the data on different locations. Likewise, saving the backup of files in multiple formats can also works as magic and keep the data safe forever.
Instant Solution
Grab Windows Live Mail Migration Tool to batch migrate Windows Live Mail emails, attachments, calendar, contacts and other database to PST, PDF, MSG, EML, MBOX, O365, Exchange, Gmail, G Suite, Exchange Server, Thunderbird, Zimbra and many more.
How to Backup Windows Live Mail Email to External Hard Drive?
To backup Windows Live Mail email to hard drive, multiple methods are available. You can either manually implement the process or you can take help of professional third party solution.
Technique 1. Backup Windows Live Mail Email to External Hard Drive Manually
Follow the steps mentioned and backup Windows Live Mail email to external hard drive:
Step 1. First, create new empty folder where you will save the backup database.
Step 2. Now, open WLM and login in the same by entering desired credentials.
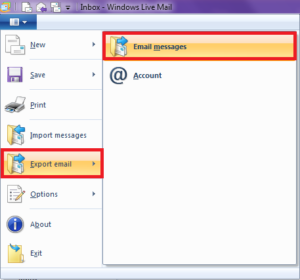
Step 3. When the screen appears, go to WLM icon, click Export email and choose Email Messages.
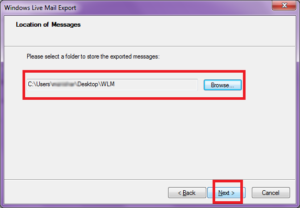
Step 4. Click Browse and choose new empty folder created in external drive and load its location. Once done, click Next.
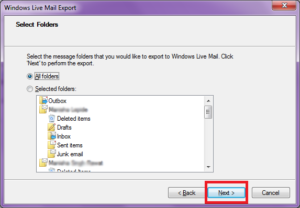
Step 5. Choose required folders or all folders that you want to export and hit Next.
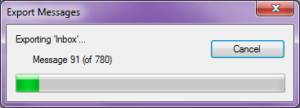
Step 6. Process will start instantly, wait till it finishes.
Step 7. When done, press Finish button.
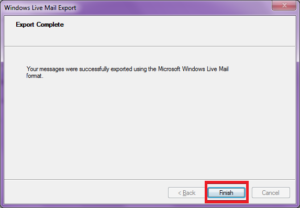
After all steps performed successfully, go to the location of that folder where you transferred all the email data. Once you get there, you will see that all the files are saved with .eml extension.
Technique 1. Backup Windows Live Mail Email to External Hard Drive using Automated Solution
The best way to backup Windows Live Mail email to external hard drive is by converting Windows Live Mail emails to different file formats. By implementing the process, you will be able to access the file on any platform without restriction. The procedure can be done by utilizing all-in-one Windows Live Mail Converter solution. The software GUI is user-friendly, provides reliability and fast processing. Besides this, it has capability to backup unlimited Windows Live Mail emails with attachments at one time. With the help of the tool, a user can backup Windows Live Mail to an external hard drive by convert WLM to commonly used file types such as PST, PDF, MSG, EML, MBOX, Thunderbird, O365, Outlook.com, Exchange and much more. Follow the steps to know how do I backup Windows Live Mail to an external hard drive:
Step 1. Download free demo of WLM Converter on Windows machine.
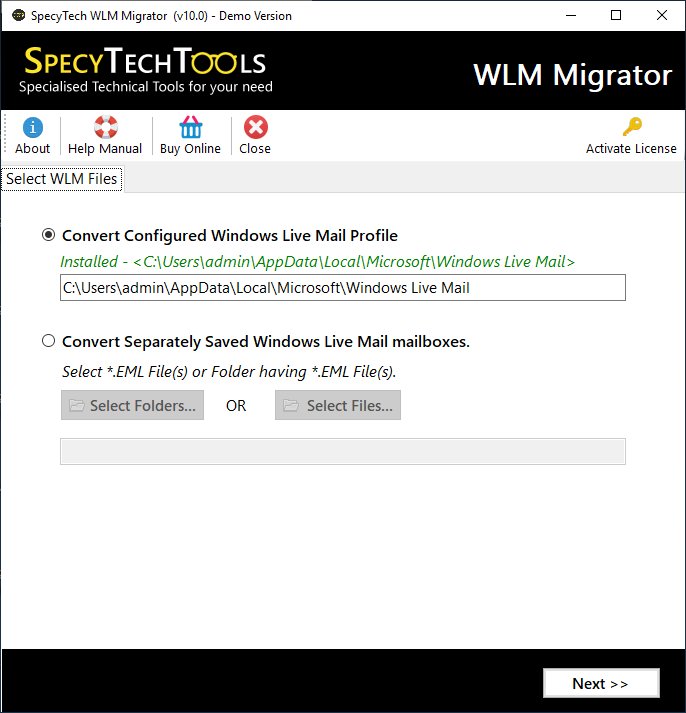
Step 2. Main screen pops-up with two options, first option can only be accessible when Live Mail is installed as it will automatically load the database path of WLM and facilitate to export all the related items to desired format at once.
The second option includes two buttons i.e. Select Files and Select Folders. The options can be used to manually load WLM files.
Once done, press Next.
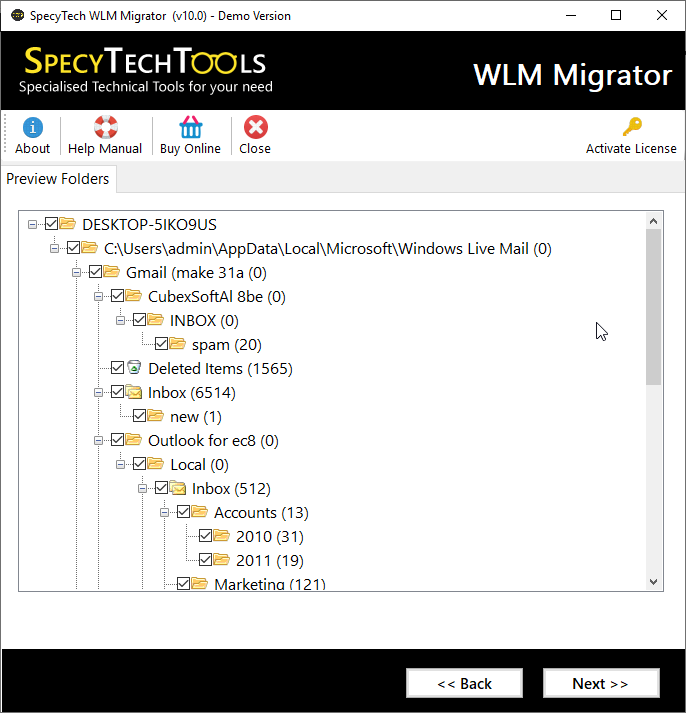
Step 3. Tool now load the complete item list of WLM with checkboxes. You can use the checkbox option to select all items or desired item for conversion. Click Next.
Step 4. Navigate to drop-down arrow of Select Saving Option and choose desired format.
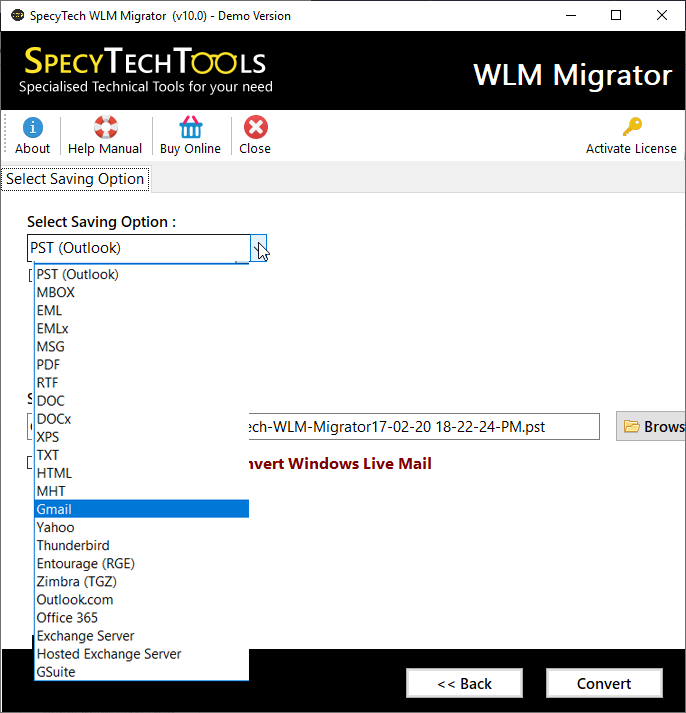
Step 5. Set the sub-options of chosen format and apply filter for specified conversion.
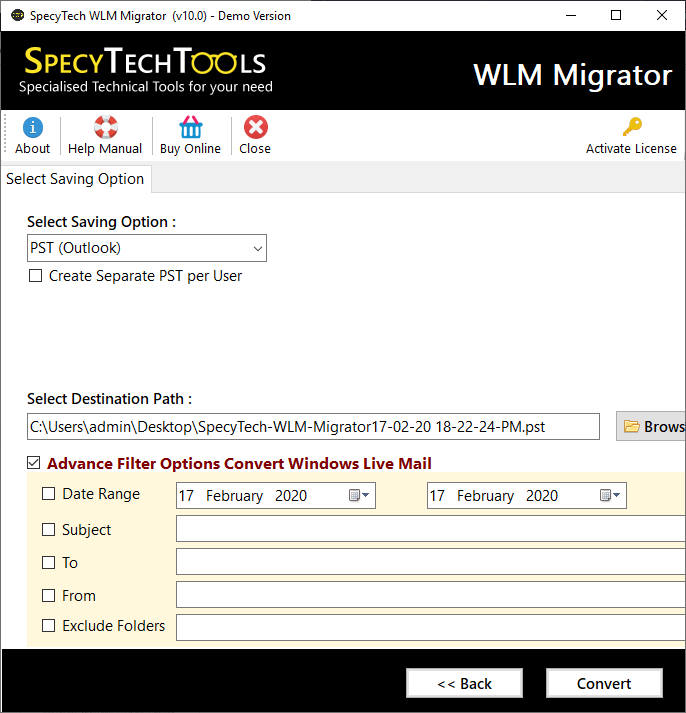
Step 6. At last, click on Convert button and initiate the process. It will end with a message “Process Completed Successfully”.
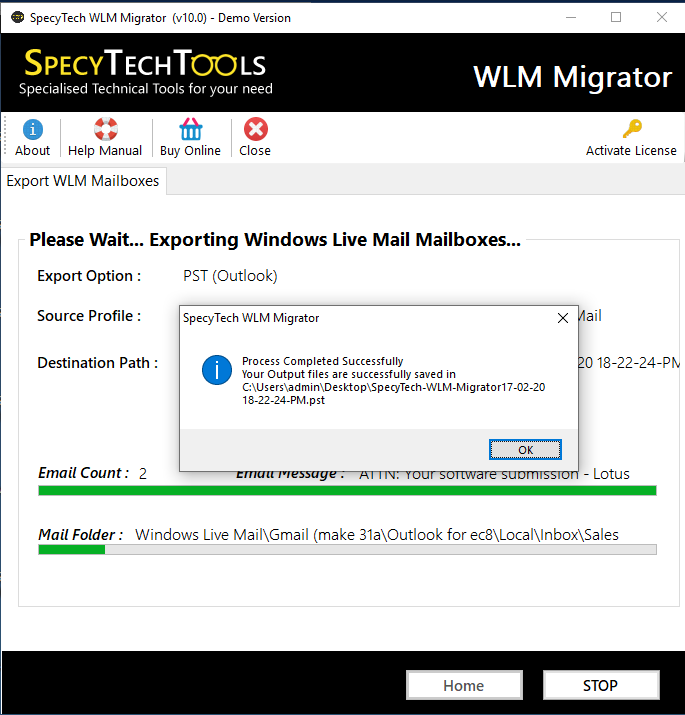
By implementing few easy steps, you can successfully backup Windows Live Mail to an external hard drive. The metadata, formatting properties and folder structure remain safe and unaltered throughout the process.
Conclusion
The blog provided different techniques to solve the query of how do I backup Windows Live Mail to an external hard drive. Technique 1 is a manual method and Technique 2 is easy, fast and professional technique. You can try and use the suitable one to backup Windows Live Mail to an external hard drive
